I fired up my Intel NUC lab environment after an extended hibernation this week and immediately ran into some issues with my vRealize Operations instance. I thought I had the new password documented, but had clearly neglected that step in the pre-christmas rush late last year.
I’ve had to perform this procedure probably a dozen times on various different appliances over the years, and I can almost do it from memory. But I thought I’d document it for myself, so here we are.
Now my reference for this is VMware KB 2001476, but it does leave out some key info that may slow you down a bit.
First things first, attempt to gracefully shutdown the vRealize Operations node via the /admin/ interface. This wasn’t possible for me as I had no access, so I had to just do a shutdown of the VM itself.
- Log in to https://vrealize-server/admin/, select the node in question, click Take Node Offline/Online
- Once the node is offline, you can gracefully shutdown the VM.
- Right click the VM and take a snapshot
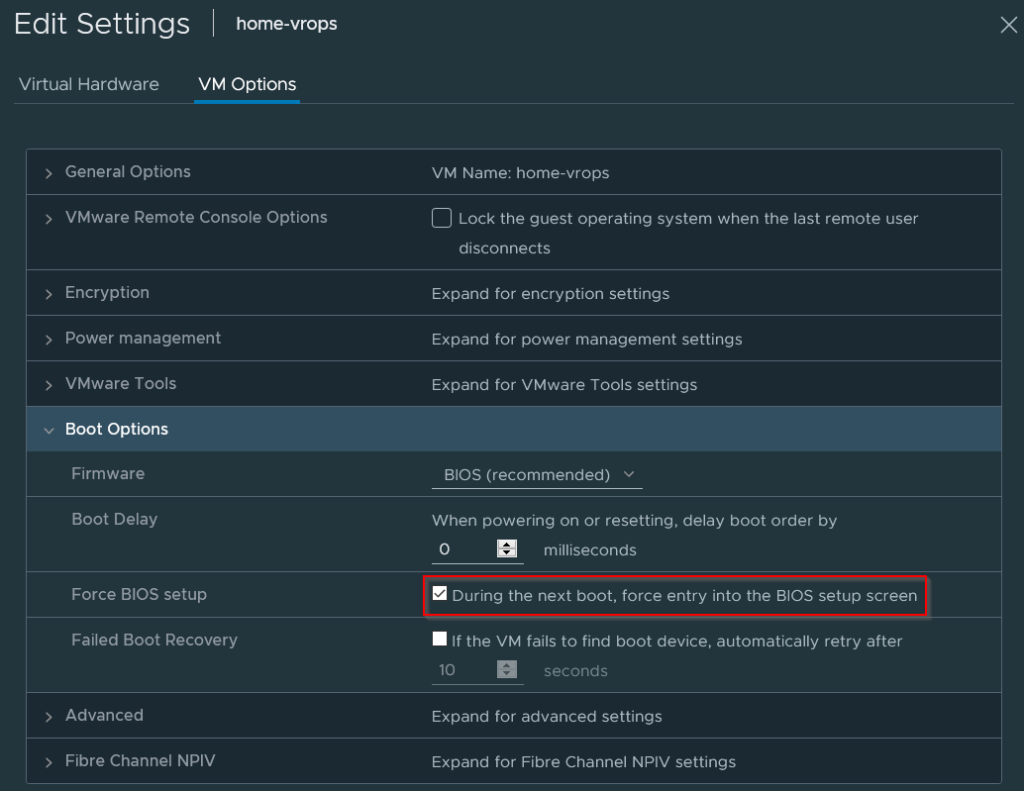
- After the VM has powered off, it’s easiest to just force the VM to enter the BIOS on next boot – this gives you a moment to power on the VM and properly connect to the remote console before it races away from you.
- Right click the VM > Edit Settings
- Select VM Options
- Select “During the next boot, force entry into the BIOS setup screen”. Click OK.
- Power on the VM and open the remote console.
- Hit Escape, then Exit without discarding changes. Be prepared to hit the ‘e’ key quickly upon exiting!
- You’ll be greeted with the grub loader. Hit the down key until you’re on the line that starts with ‘linux’.
- Press the right arrow until the cursor moves to the end of the line that begins with ‘linux’.
- Enter the following text, ensuring there is a space after the end of the previous text
rw init=/bin/bash
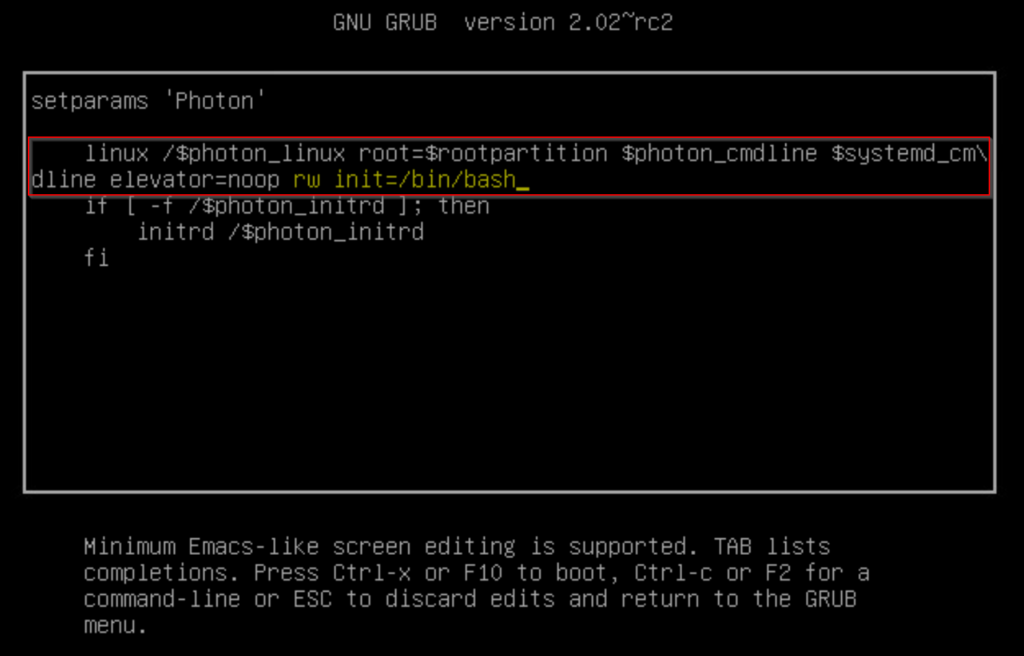
- Press F10 to continue the boot
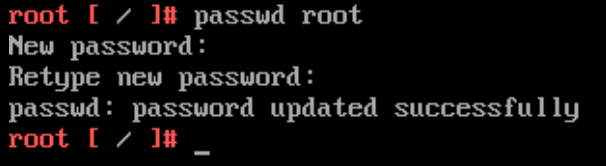
- You’ll now be presented with a root login prompt. This is a brief insight into why physical / console access is such a critical part of system security.
- Type
passwd rootand follow the prompts
- You may have locked out the root account in the course of attempting to log in. The next step temporarily prevents account lockouts. I’m going to leave this permanently in place for my lab environment, but you probably don’t want to leave this in place for production.
- Type
vi /etc/pam.d/system-auth - Comment out the line that contains the unlock_time. In vi, you need to press the ‘Insert’ key to enter text.

- Press ‘Esc’ to exit editing mode, type :wq to ‘w’rite and ‘q’uit
- To save all this, type
syncthen hit enter. - Type
umount / - Type
reboot -f - Once the VM reboots, log back into the console with your shiny new root password.
- To ensure the account is fully unlocked, run
pam_tally2 -u root --reset - Revert the changes you made to /etc/pam.d/system-auth (remove the comment at the beginning of #auth on line 3), then save
- Assuming everything works and you are happy with the VM, remove the snapshot you took at the beginning
- You’re good to go!