Documentation is available here.
Containers are great. Their lightweight nature makes life easy through portability, consistency and speed. By shipping workloads with all their dependencies, we can get those workloads producing value much faster.
In the case of Attack Range, this means we can get a working attack simulation running rapidly. This may or may not be a crucial factor, so other deployment options are still equally valid. But speed is usually good, so let’s give it a crack.
Preparation
The beauty of containisation is that your pre-requisites are pretty minimal. In this case, a container engine, I’m using Docker on Ubuntu, although podman is increasingly popular alternative. On Windows you could use something like Rancher Desktop with containerd, or good old Docker Desktop.
Container time

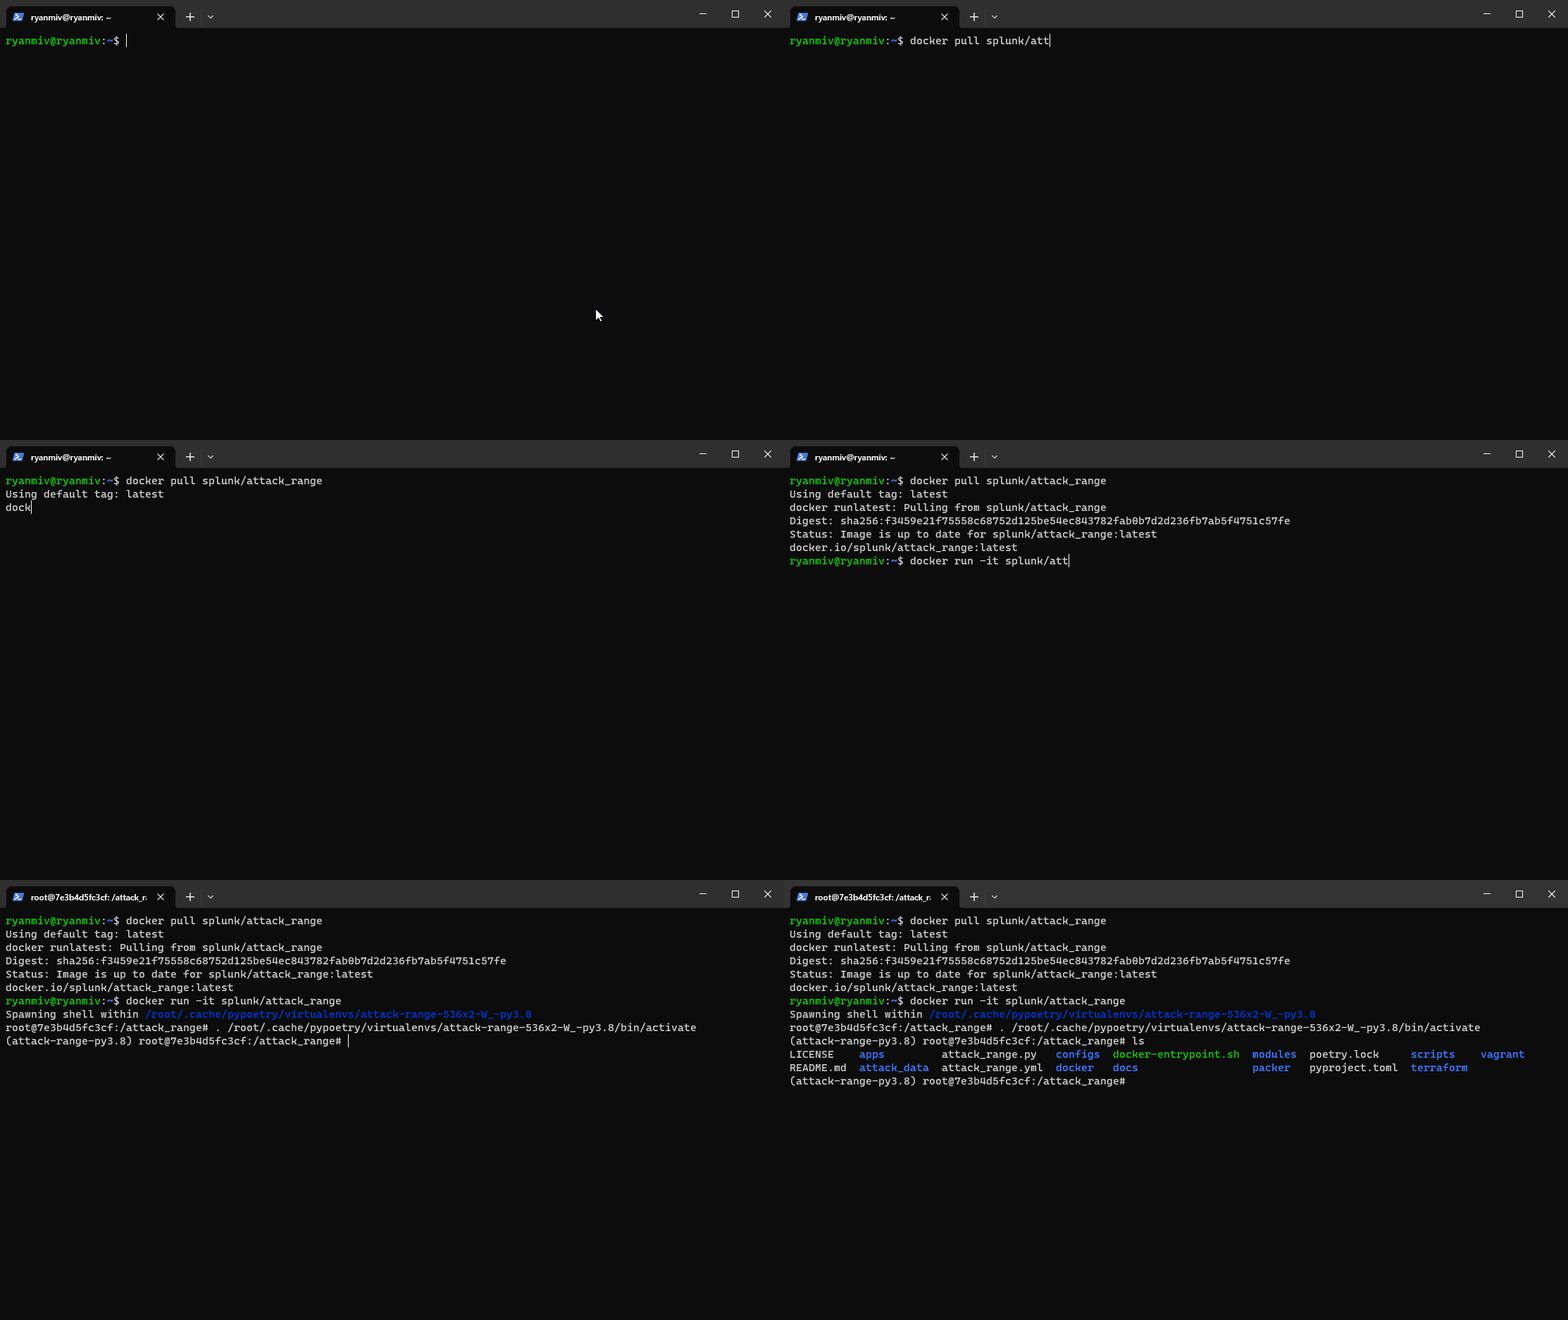
Let’s get started by pulling and then running the latest attack_range image
docker pull splunk/attack_range
docker run -it splunk/attack_range
This will launch an interactive shell inside our Attack Range container. Given we are deploying to AWS, you’ll need to provide your credentials and default deployment location with the command aws configure
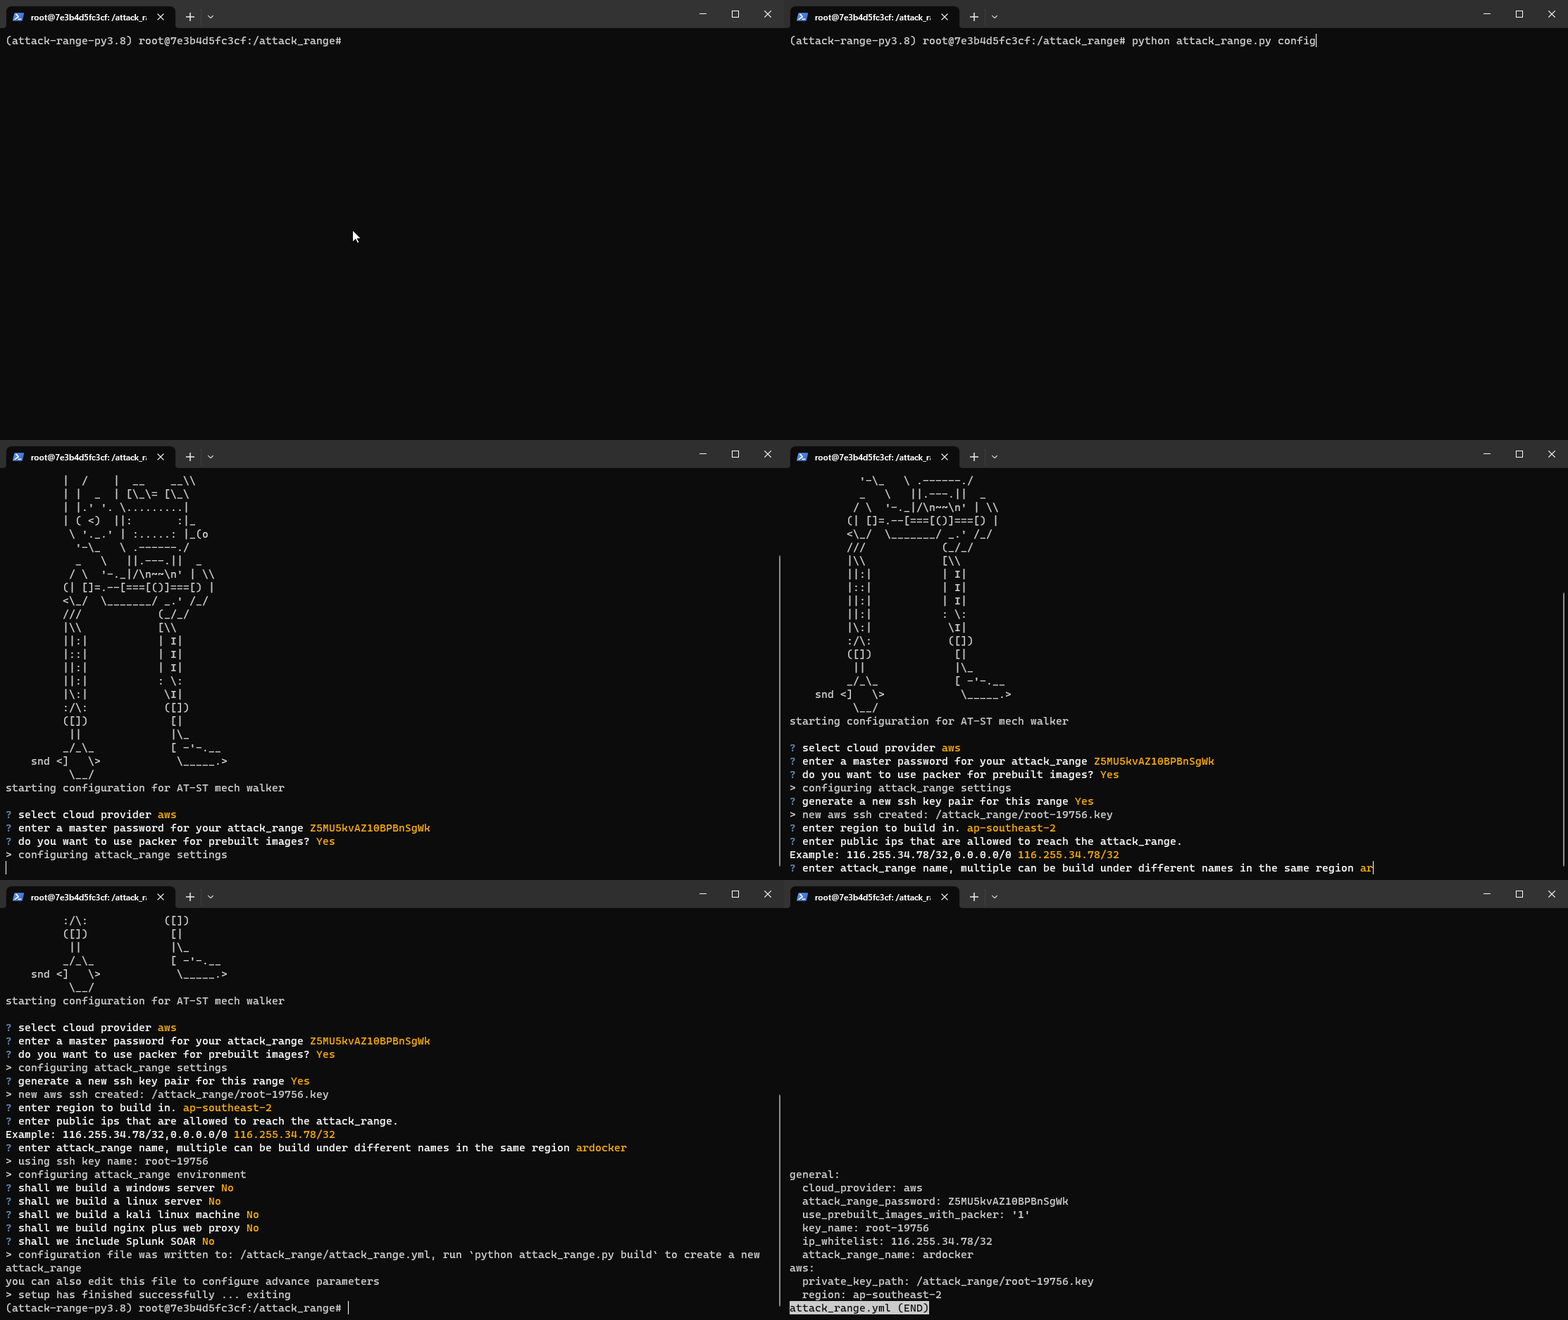
There are only two key steps left. The first is to generate an config to deploy from, with python attack_range.py configure
You’ll now have an attack_range.yml file, go ahead and take a look. Detailed documentation of the config options are available here.

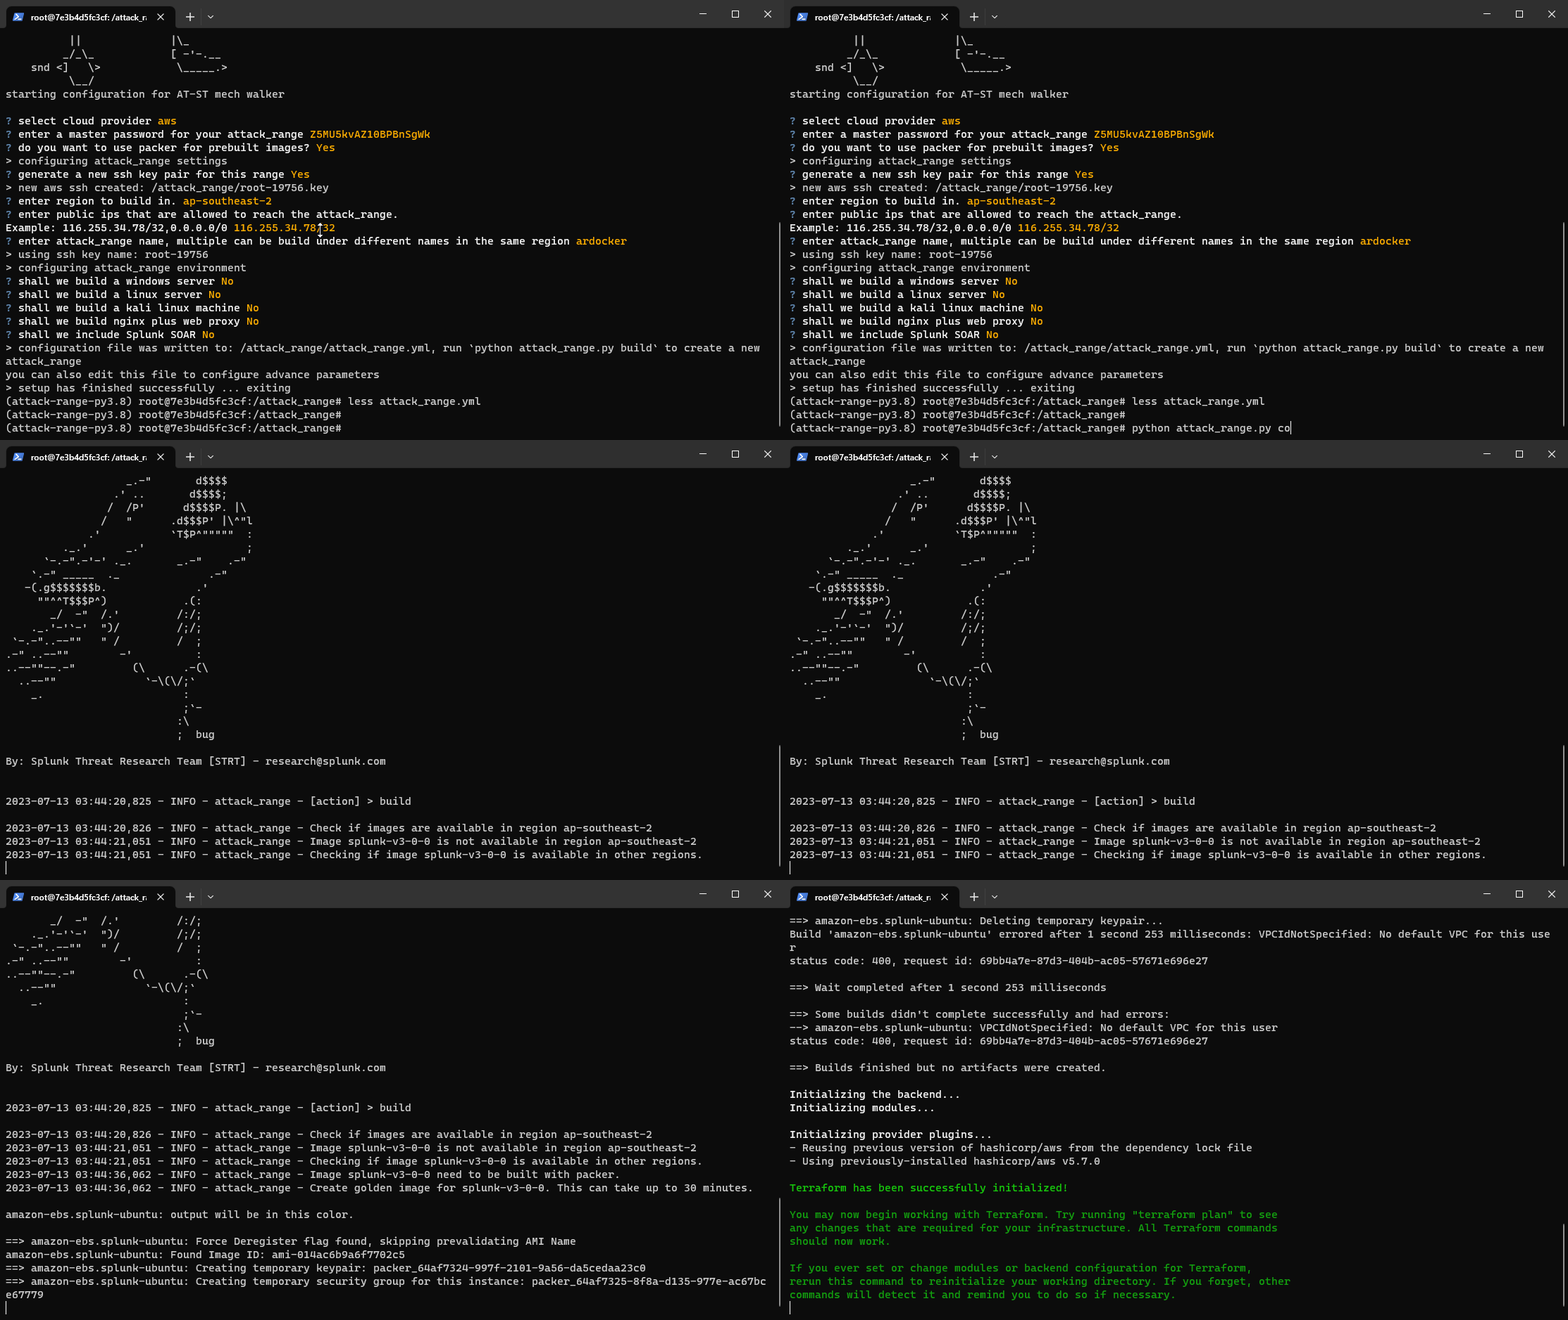
All that’s left is to build the environment with python attack_range.py build

This will get you a configured Splunk server along with any other environments you’ve added (e.g. Windows, Kali).
Next up is a post on how to actually start simulating attacks – stay tuned!